Activity Bank
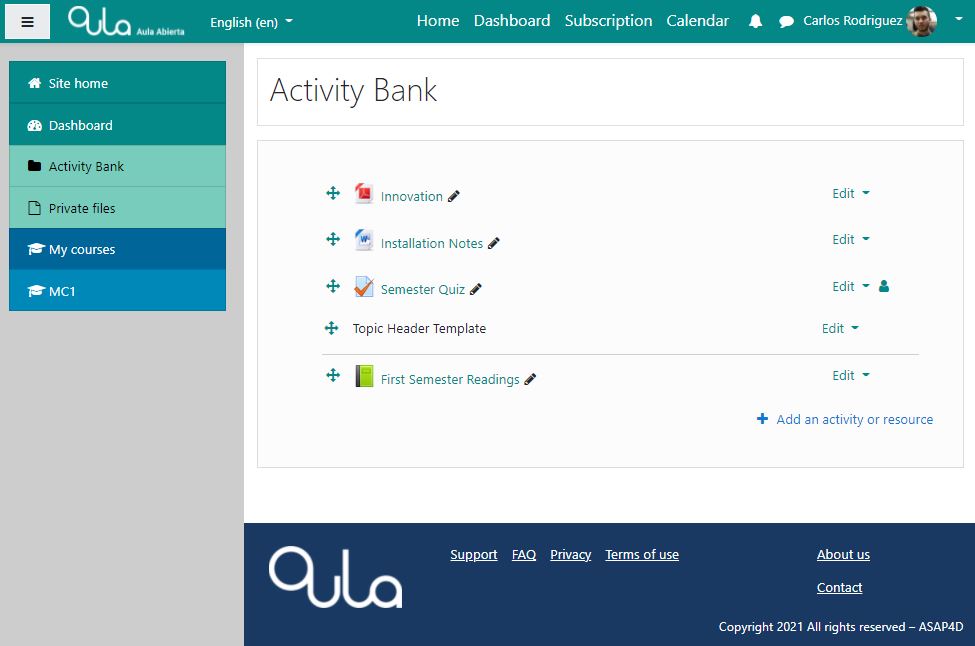
The Activity Bank is a space where you can create Activities and Resources and save for use in multiple places and across multiple courses. It is as the name indicates, your Bank of Activities.
The Activity Bank will be very useful if you design courses using the same activity or resource type many times, perhaps with different content but with the same settings for fonts and colors, layout and such. If you develop the activity in the activity bank you can just import in to any place in your course and courses and edit it for the specific use, without a need to recreate it every time from scratch.
How to use the Activity Bank
Step by step overview next ->
Step 1…..
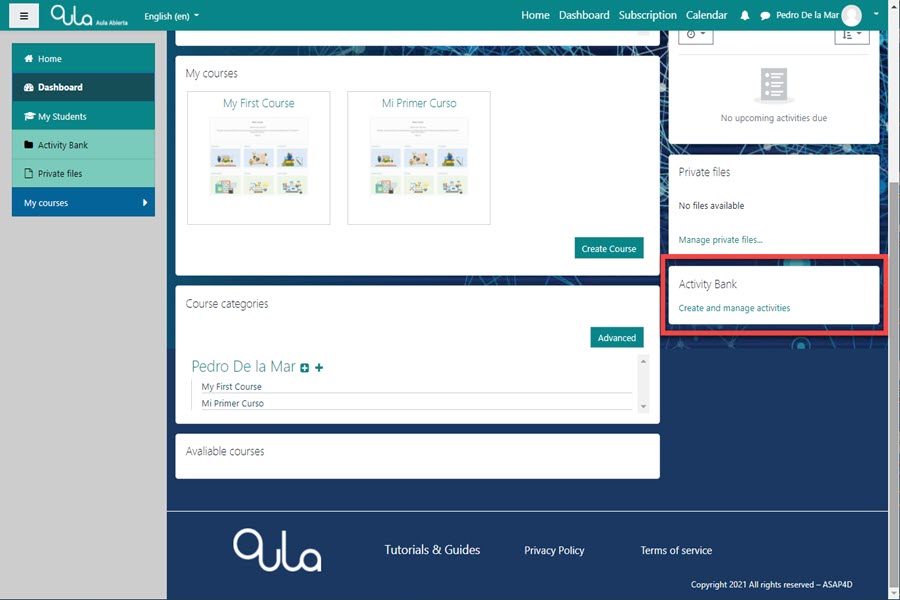
To start adding activities and resources to the Activity Bank, first find the Activity Bank block it in your Dashboard, then click on “Create and manage activities”
Step 2…..
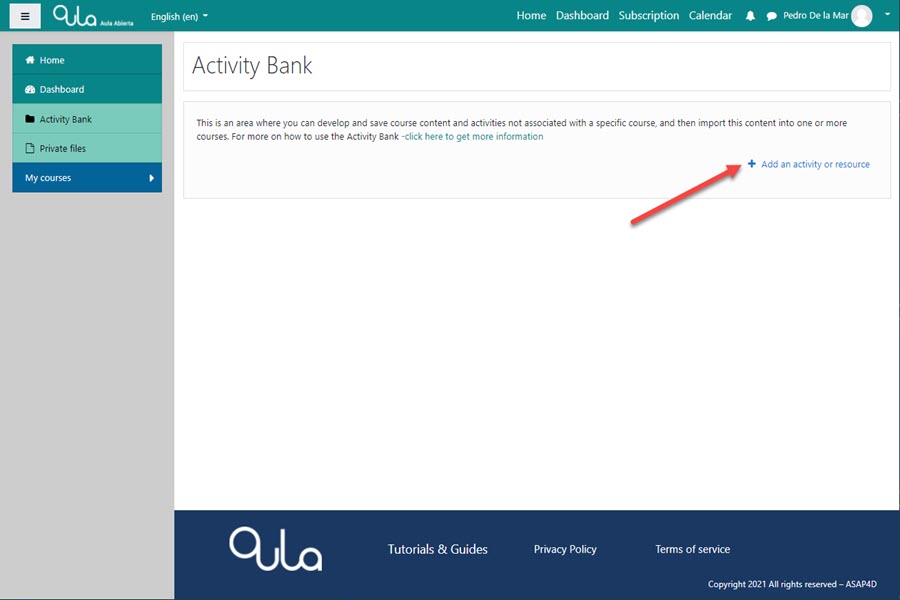
This brings you to the Activity Bank which is empty as we have still not added any content here.
Well, we use the Label resource a lot and with some specific settings and so let´s add that to the Activity Bank.
Click on “+ Add an activity or resource.
Step 3…..
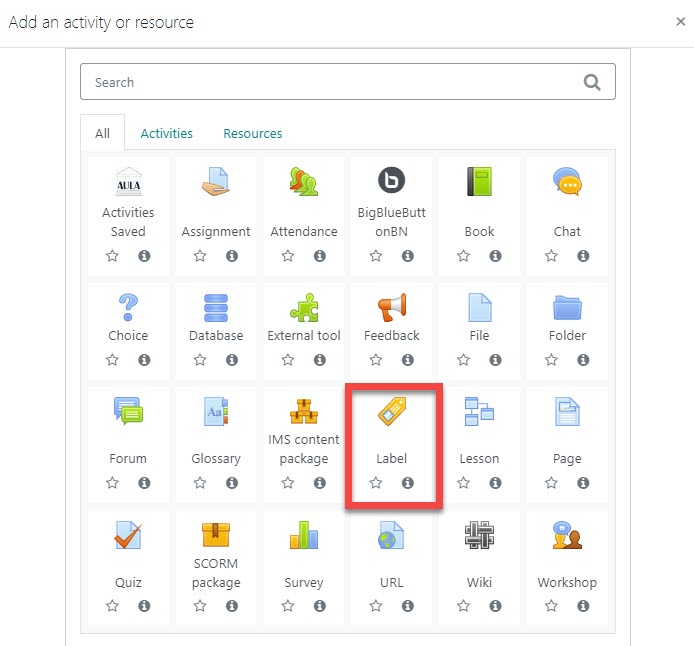
This opens the Add and activity or resource pop-up window where we can choose what activity or resource we want.
Let´s select the Label resource.
Step 4…..
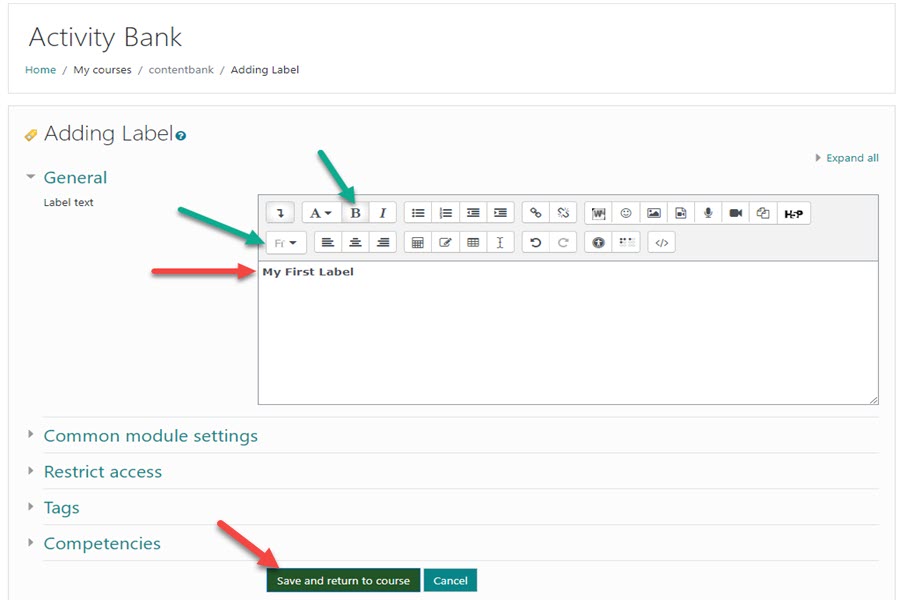
This brings up the edit window for us to create a label. We´ll type in “My First Label”, then change it to Bold and well, let´s also set the font type to Verdana.
This is it and so let´s click on “Save and return to course”
Step 5…..
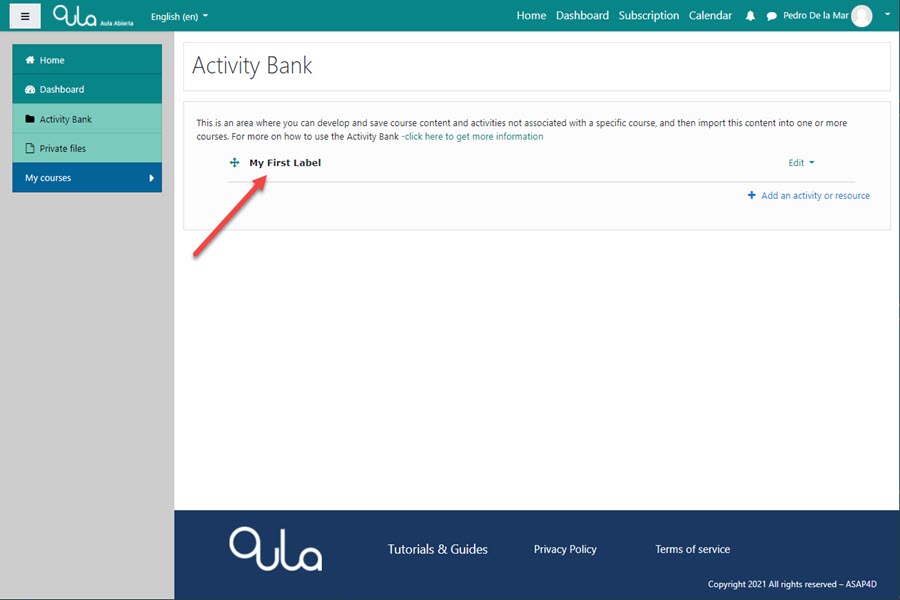
This brings us right back to the Activity Bank and as we can see, the Label resource we created is now saved here.
This is it, we have now saved our first content in the Activity Bank.
Let´s now go back to the Dashboard to see how we can use this in one of our courses.
Step 6…..
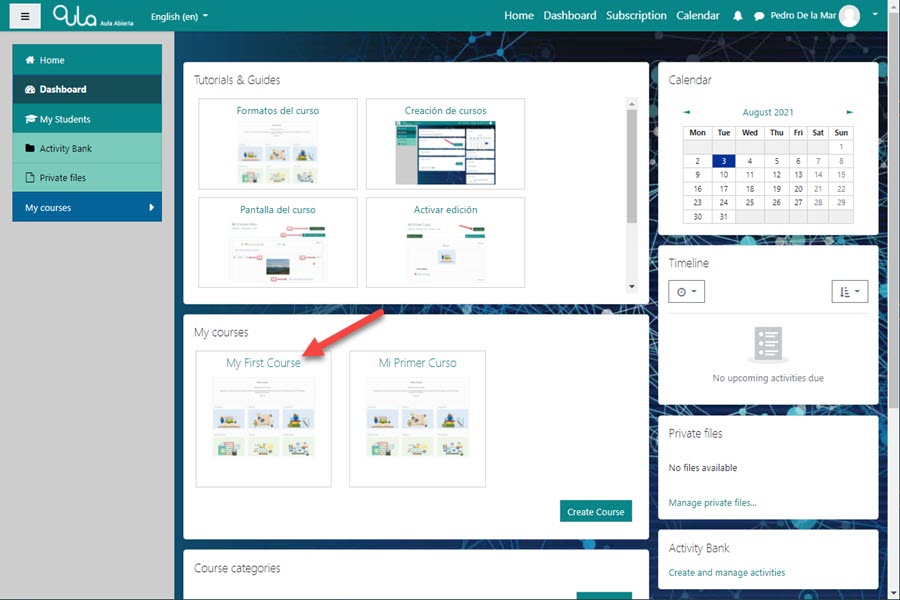
In the My Courses block in the Dashboard, let´s choose a course to see how we can use the Activity Bank content.
Step 7…..
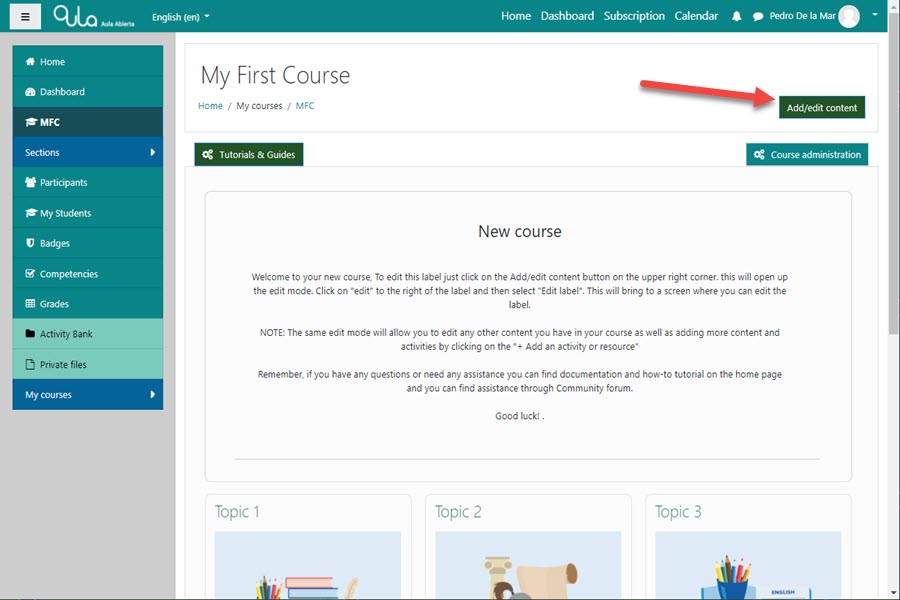
In the course we will need to click on the “Add/edit content” button to activate the edit mode.
Step 8…..
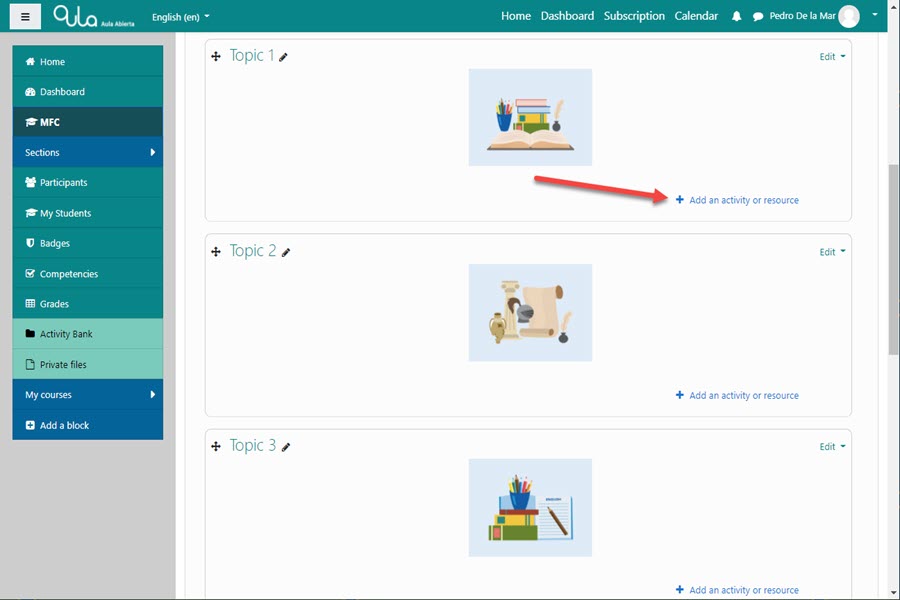
Now in the edit mode, we can choose where we would like to put the label we created then Click on “+ Add and activity or resource”
Step 9…..
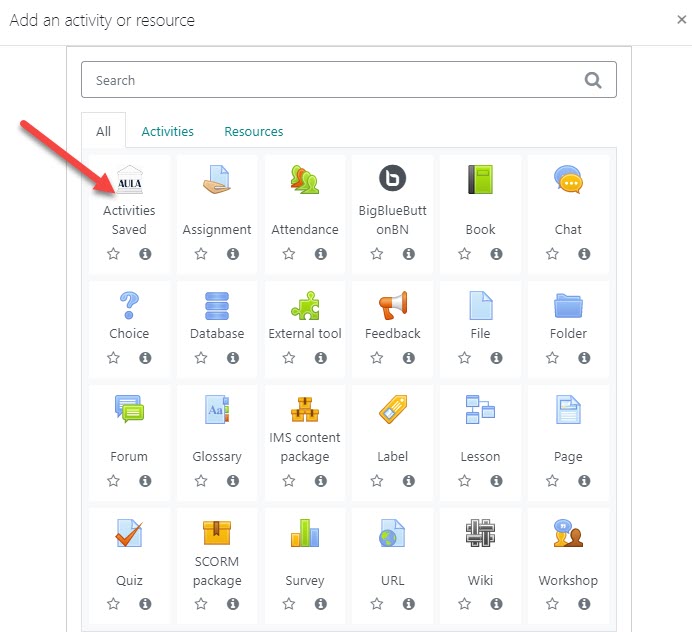
This opens the Add and activity or resource pop-up window again, but this time we will choose and click on “Activities Saved”
Step 10…..
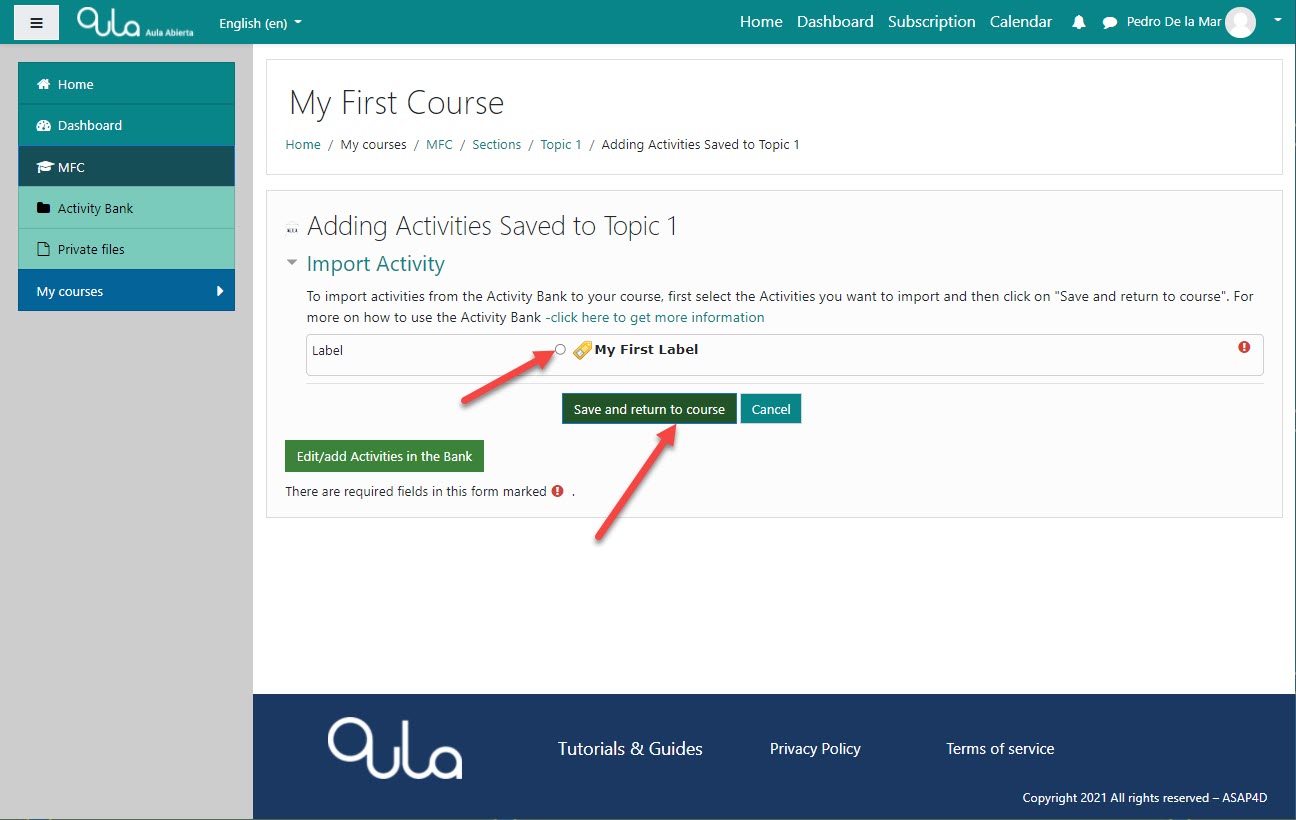
This opens the Activity Bank but now the screen is slightly different.
Now we can select which content(s) to import by clicking on on the radio button next to the activity name.
When done, click on the “Save and return to course button”
NOTE: As you develop your course(s) your Activity Bank will fill up with dozens of activities and resources you have saved and you can well imagine how this will speed up and simplify your course development process.
Step 11…..
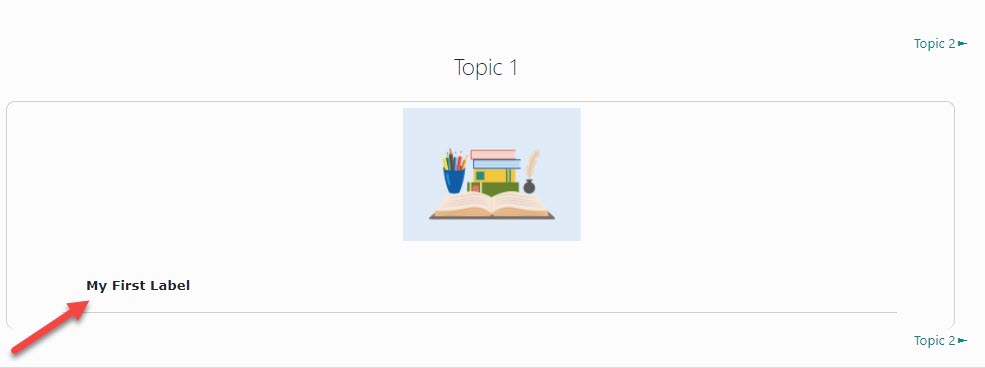
Finished. We have create our first Label, saved it in the Activity Bank and imported it into a course.
Your turn!
