Add / edit content
This is a brief overview of the Add / edit content function found on the Course Screen
The eight screens below will highlight the editing functionality that you can access from the Course Screen
1.
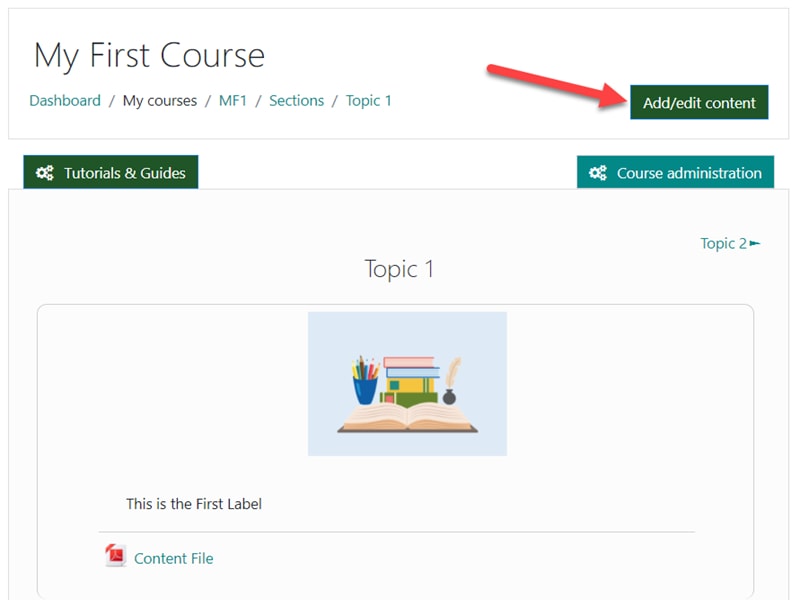
On your course screen you will find three green buttons.
“Course Administration” which is covered in a separate Tutorial section,
“Tutorials & Guides” which is your quick link to all the tutorials for easy access directly from the course development screen.
And the “Add/edit content” button to access the editing functionality on the Course Screen.
2.
Click on the “Add/edit content” button.
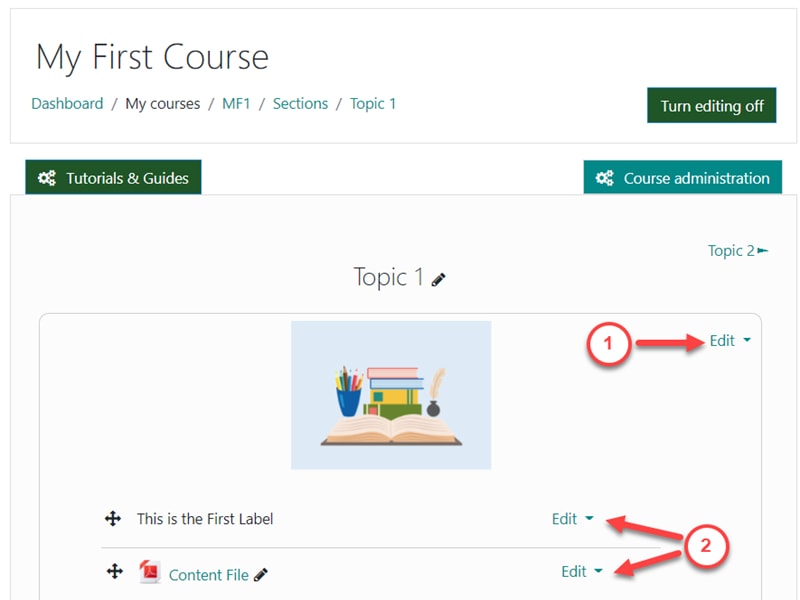
Now the editing mode is activated and you will be able to see where you can access the edit functions on this screen. As you will note now you can edit:
1. The Course Section and the
2. Course Content such as activities and resources
3.
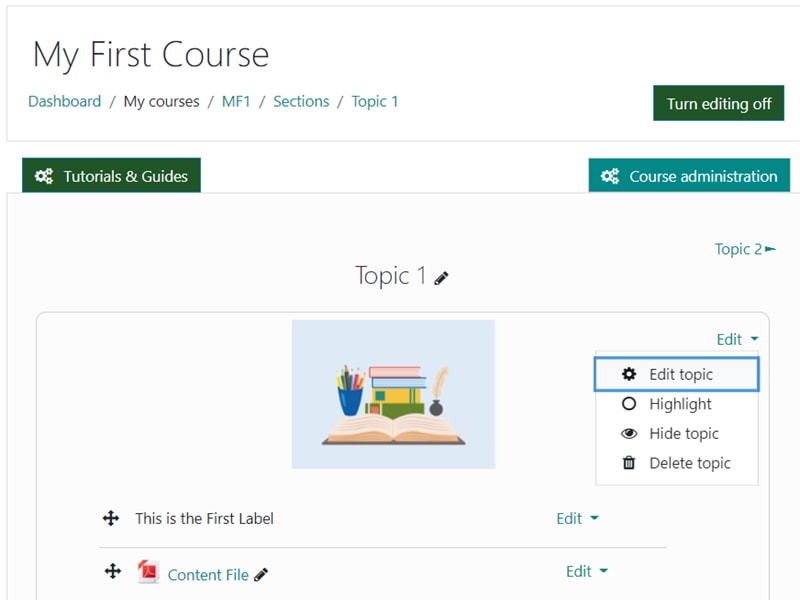
The course section “Edit topic” selection will display a drop down menu where you can Edit the topic label and image.
The drop down menu also gives you the options to Highlight the Topic, Hide the Topic from your students when you are still developing it or if the students are not ready for the information. Finally, you can delete the topic.
4.
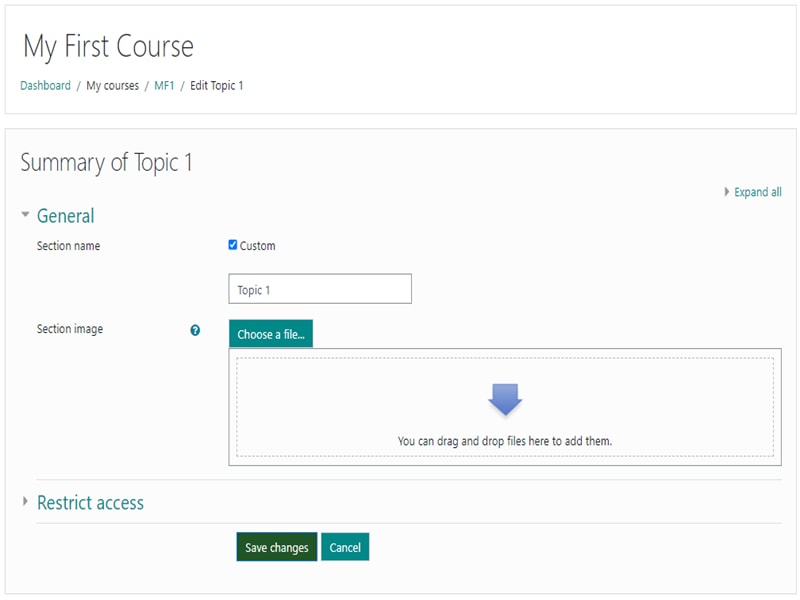
Click on “Edit topic” and this screen will appear.
Here you can now easily edit the topic title and also upload an image for the topic.
Click on Save changes and you will return to the Course Screen.
5.
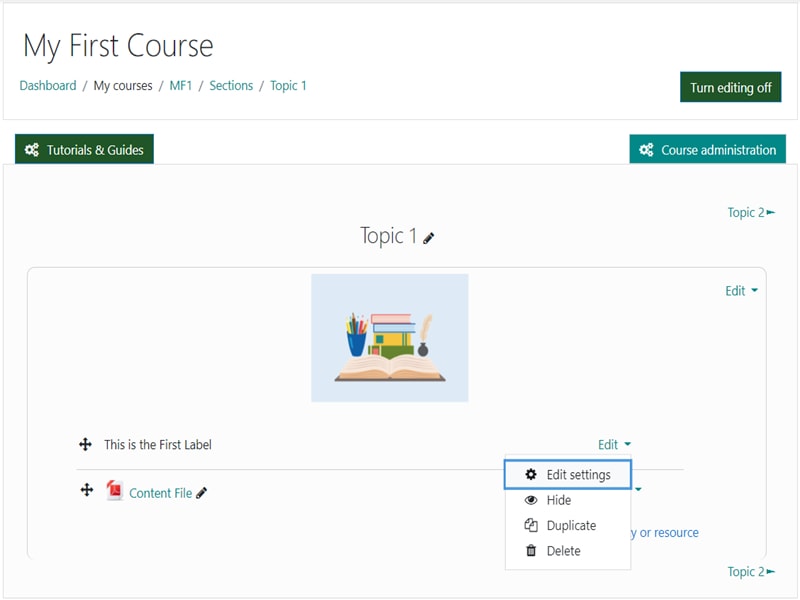
Back on the Course Screen, let´s review the content Edit drop down menu which is a bit different.
In this Edit menu you have the same option of turning on and off displaying the activity with the Hide selection.
Here you can also Duplicate the activity, which is very convenient if you are developing a lot of similar activities or content types.
6.
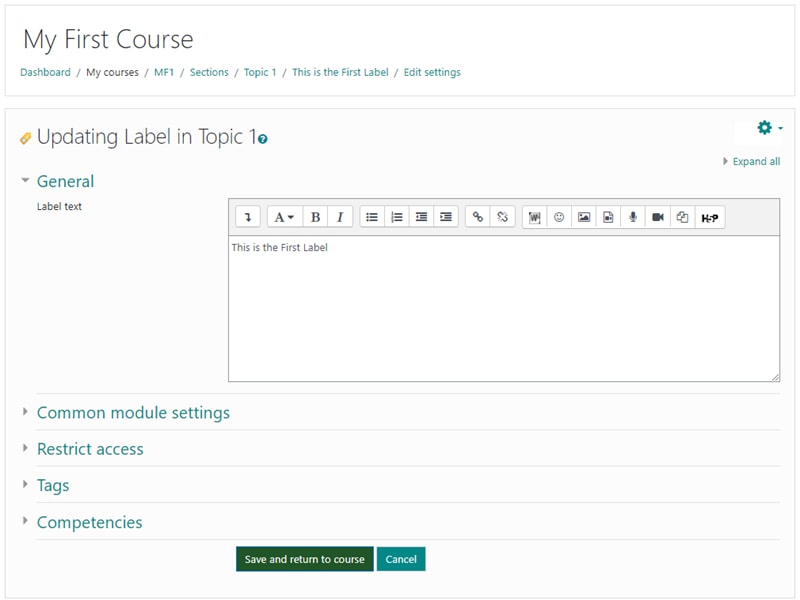
When you click on the “Edit settings”, you will get a screen where you can edit this Label resource. On this screen you will find an editing window as well as any settings that can be modified.
Please note that this screen will be slightly different depending on the activity or resource type you are editing. A file, as an example, will have an additional window for importing files and so on.
7.
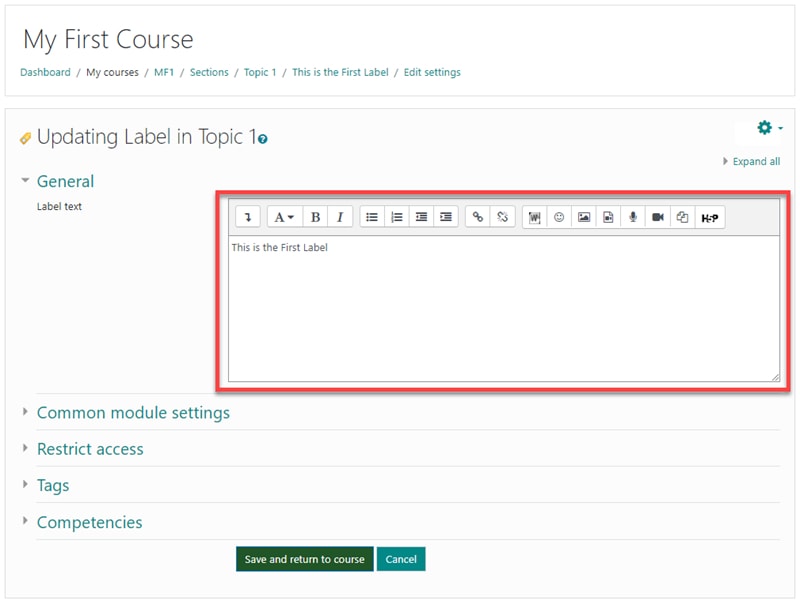
The important part on this screen is the actual editing window and the choices it offers for you to control the content and its visual presentation.
Please refer to the Tutorial section on “Editors” for more detailed information on how this works.
8.
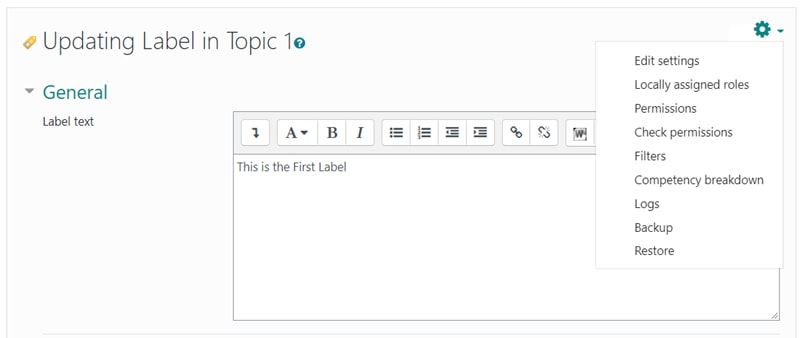
Finally you will note that in this screen you will as well find a cog wheel drop down menu offering you even more options for various settings and information access.
The most important part of this is to note that here you can make a backup of just this activity. This can be useful if you want to restore and use the activity again in another course or even in another platform.
